| Scanning Product Barcodes (Barcode Input) |
|
|
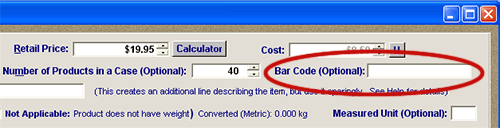
Level 5 and Higher Feature One of the most versatile features in the Level 5 (or higher) program is the ability to scan products directly into an invoice. From the Main Invoice Screen, you can scan a product barcode, and AnyOrder will automatically enter the name of the product, its catalog number and price in the Item Area. It's quick. It's efficient and it's convenient. (For general information on barcodes, see Barcode Features. 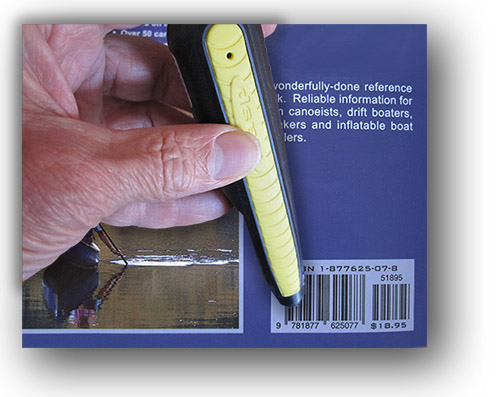 With a barcode reader, you can scan products right onto the Main Invoice Screen. The barcode scan feature is, of course, ideal if you sell products directly to consumers. You can scan products just like at the grocery store. But even if you don't directly sell directly to the consumer, you can use this feature to speed up the process of entering products. How do you that? One common way is by putting together a pricing booklet. On each page of your pricing booklet, you have a list of your products with plenty of space between each product. Beside each product and price, attach the product's barcode label. (If your products don't have barcode labels, you can print up your own by using the "Print Barcode Label" feature accessed from the Product Information Database.) When it comes time to enter products on the Main Screen, it's just a matter of scanning the barcode labels. Getting Started. In order to use product barcode scanning, you'll need to enter the numbers making up the product's barcode in the Product Information Database. You could type in the numbers, but the easiest way to do it is by scanning the product's barcode. Place your cursor in the Barcode field (illustrated below) and scan the product. (If you don't have your barcode scanner programmed to send an F2, then you'll need to press F2 on your keyboard first.)
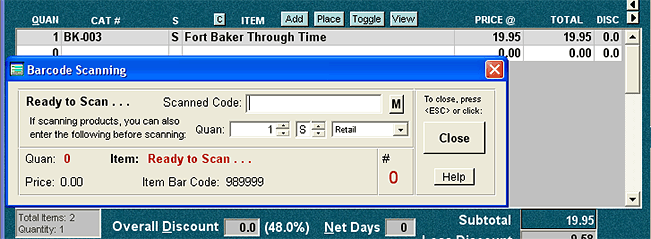
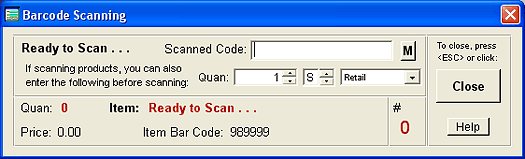
When you've finished entering barcodes in the Product Information Database, you'll be ready to start scanning. To begin, you need to activate the Barcode dialog box. That's done one of several ways. The first is select PRODUCT TOOLS >> BARCODE INPUT from the menu bar on top of the screen. You can also activate this menu by pressing F2. And you can click on the "Barcode" button on the Main Invoice Screen. The Barcode dialog box appears as shown below:
The most efficient way is to program your barcode reader with a F2 prefix. (For more information on how to program your barcode reader, see Barcode Features). When the barcode reader is programmed in this way, the barcode dialog box is activated automatically as soon as you scan the barcode. Additionally, the first item that you scan will be entered directly into the Item Area. The barcode dialog box remains on the screen ready for you to scan the next item. Other than one exception, your cursor can be located in any field on the Main Invoice Screen to scan a product with a programmed barcode reader. The exception is the "Tracking #" field. If your cursor is in the "Tracking #" field, AnyOrder assumes that you want to scan in the tracking number, and the number is pasted directly into the "Tracking #" field. However, as long as you don't have the cursor in the "Tracking #" field, AnyOrder will assume the scanned barcode is from a product and will process it accordingly. The Barcode Dialog Box Entering Quantities. Let's look closely at the barcode dialog box. One key part of the dialog box allows you to enter the quantity. You can type in the quantity or you can use the scroll bar to increment the number. Whenever you adjust the quantity, it applies to the next product that you scan. The procedure is to enter quantity and then scan. (If you don't enter a quantity, AnyOrder will assume a quantity of 1.)
Another way to change the quantity is to scan the barcode more than once. If you scan it 4 times, the quantity appearing on the invoice will be 4. Note that if you use this method, you'll want to stay with one product, scan it the required number of times, then move to the next product. If you switch to another product midway through the process and return to the original product, you'll end up with the same product entered in two locations. As long as you keep scanning the same product, however, it will remain in one row. Entering the Quantity of the First Item. The question that naturally arises is: how do you control the quantity of the first item that is scanned? Remember, if you have your barcode reader programmed with a F2 prefix, the first item scanned will be immediately pasted in the Item Area. By default, the quantity of the first item will be 1. One way to change the quantity of the first item is use an empty row in the Item Area. (New invoices always start with an empty row in the Item Area. If you need to create an empty row, place your cursor in the last used row, and press the down arrow.) Type in the desired quantity in the empty row. Then scan the product. The item's name, price and catalog number will appear in the row and the quantity that you've typed in will be retained. Another way to indicate the quantity for the first item is to scan in the product. The barcode dialog box will appear. Type in the total quantity minus one. Then scan the item again. For example, let's say you sold 10 copies of the Adventures of Huckleberry Finn. Since this is the first item (and you are using a programmed barcode reader), the Adventures of Huckleberry Finn will automatically entered in the Item Area with a quantity of 1. But you can change that. When the barcode dialog box appears, you would enter 9 in the Quantity field. (You already have a quantity of 1. That means that you need to add 9 more to equal 10.) After entering 9, you would scan the barcode one more time. The end result is 10 on the invoice. You can also use this technique to add or subtract quantities. For example, let say that the invoice is showing that a quantity of 12 for Adventures of Huckleberry Finn. But the quantity is suppose to be 10. You can enter -2 in the quantity field and scan the barcode again and the quantity on the invoice will be reduced to the proper level. Finally, the third way to indicate starting quantity is to press the "Barcode" button on the Main Screen or press <F2> (or select PRODUCT TOOLS >> BARCODE INPUT). That brings up the barcode dialog box without entering the product. When the dialog box comes up, change the quantity to the desired amount; then scan the barcode. Other Features on the Barcode Dialog box. You also have the option of controlling the S-code. For example, on the Barcode dialog box, you can select "R" for return. When you scan the item, the product will be categorized as a return and the amount credited to the customer. The procedure is the same as quantity. Bring up the Barcode dialog box by clicking on the "Barcode" button or press <F2>. Once the Barcode dialog box appears, you can change the S-code to the desired letter, then scan the item. You may also select the pricing level. Before scanning the first item, press the "Barcode" button on the Main Screen or press <F2>. The Barcode dialog box comes up. Select the pricing level, quantity and/or S-code, and then scan the barcode. Note that in the Level VI program, you can also associate a pricing level with a customer. The Barcode dialog box will automatically pre-set to the customer's pricing level. If desired, you can enter barcodes manually. Type in the barcode and then click on the "M" (for Manual) button and the information will be entered in the Item Area. The Barcode dialog box will keep track of how many different items you are scanning. As long you keep the dialog box open, it will increment the count and display it in the lower right hand corner. Additionally, the dialog box lists the most recent item that you've scanned, along with the quantity, price and barcode.
|