User Defined Fields


|
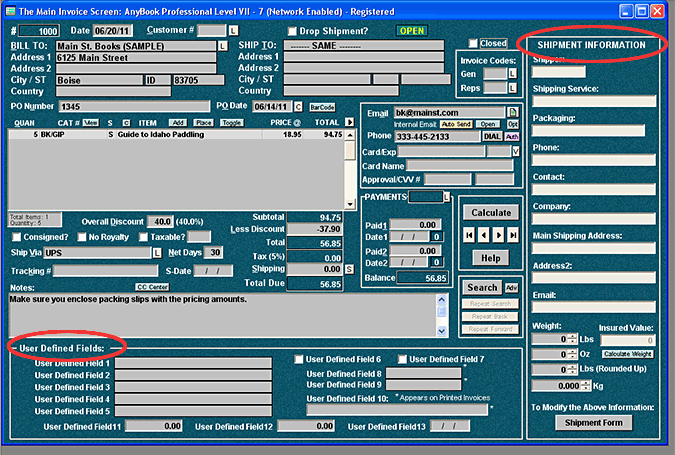
Parts of the Invoice Screen User Defined Fields |
|
|
User Defined Fields are available with the Level 4 program and above. If desired, you can design and add your own fields to the Main Invoice Screen. These fields, which are called "User Defined Fields," are set-up by selecting FILE >> ACTIVATE SHIPMENT & USER DEFINED FIELDS. Once you've activated User Defined Fields, you can access them in one of two ways by selecting WINDOW >> USER DEFINED FIELDS WINDOW. The first is to have a window overlap the Main Invoice Screen. The second is to attach the user defined window to the bottom of the screen. In order to use the attachment option, you will need to have your monitor resolution set at 1024 by 768 pixels or greater. The illustration, below, show the User Defined Fields attached to the bottom of the screen. It also shows the Shipment window attached to the side of the screen (more information on Shipment Window).
When the User Defined Window is attached, you access the fields the same way you access any other fields on the Main Invoice Screen: by clicking on them or using TAB. Most of the fields are character fields which can be used for a variety of purposes. Two of the fields are checkbox fields. Two others are number fields formatted with two decimal places for monetary amounts. And finally one final field is a date field. More information: User Defined Fields |