| Starting the Import Process |
|
|
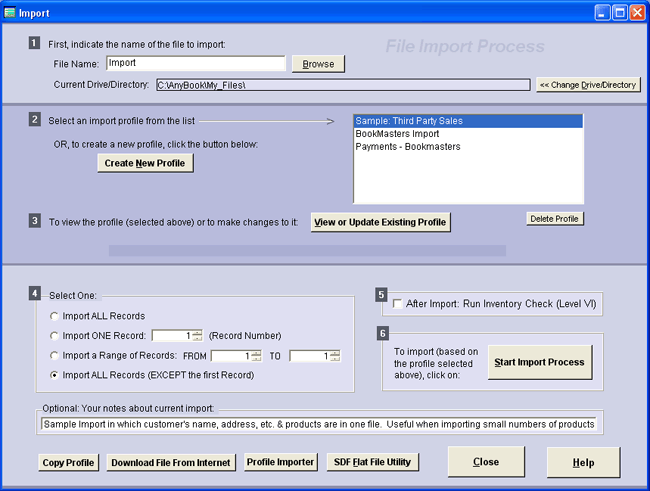
Import - Starting the Import Process - Level 3 and Above Step By Step Procedure (Starting the Import Process) This is the last part the step by step procedure for Importing. For information on the steps leading up to this point: Other Options Once you create the profile in the second dialog box and add a replacement table (if needed), you'll be ready to import the file. To do so, return to the first import dialog box:
Select the Records Select which records from the import file that you want to move into AnyOrder. You can import all of the records, a selected record, or a range of records. For details on any of these options, see the first import dialog box. Start Process When you have selected the records to import, click on "Start Import Process." AnyOrder will then import the records and add them as new invoices. When the import process is complete, exit out of the Import dialog box and page forward through the new invoices. Double check and make sure the import came through properly. If not, you can undo the process. To undo the process and remove recently imported records, select FILE and REMOVE IMPORTED RECORDS from the menu bar. If it is necessary to remove imported invoices be sure to do it right away. Once you add new invoices in addition to those that you've imported, you'll no longer be able to remove them. This is the end of the step by step procedure for importing files. More Information on Importing Import Profiles (Second Dialog Box) Other Options (Third Dialog Box) Working with Import Files in Excel
|