| Select or Create a Balance File Dialog Box |
|
|
Level II or Higher Feature
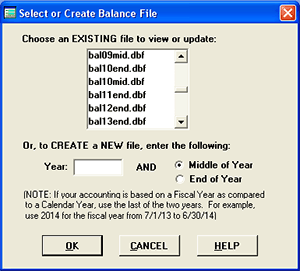
The "Select or Create a Balance File Screen" is reached by selecting MAIN TASKS and BILLING STATEMENTS & BALANCE FILES. This will bring up the Billing Options Screen. You have several options, if you click on the fourth option, "Manually Update Balances & Make Balance Files," the screen shown below appears. More details on Balance Files.
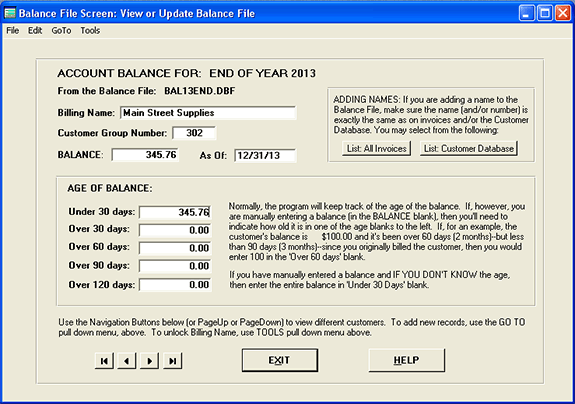
At the top of the "Select or Create a Balance File" dialog box, you can select from a list of existing Balance Files. Or, at the bottom, you can create a new file. If you are creating a new file, you'll need to enter the year and whether it is a mid year Balance File or end of the year file. Note. If you use a fiscal year which does not match the calendar year, use the latest of the two years. For an example, if your fiscal year goes from July 1st of 2013 to June 30 of 2014, use "2014" to indicate the year. Thus, to create a mid year balance, you would type in "2014" in the year blank and select "Middle of Year." Either pick a file from the top list, or enter the information for a new file. After you click OK, the next screen that appears (Balance File Screen) is where you'll find all the information contained within the Balance File. The Balance File Screen is illustrated below:
Other Information about Billing Statements: Balance File Screen (Manually Update Balance Files) Batch Printing Billing Statements Exporting Billing Statement Data
|